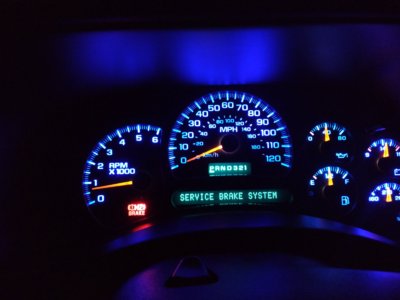
“Is that pesky ‘Service Brake System’ light on your dashboard causing you worry?
Don’t fret! In this informative guide article, we’ll walk you through the step-by-step process of resetting the Service Brake System light in your vehicle.
Say goodbye to those nagging alerts and drive with confidence again. Find out by the expert tips and tricks to reset your brake system light hassle-free, so you can hit the road safely and smoothly.
Let’s dive in and get your car back in top shape by knowing how to reset service brake system light !”
Step-by-Step Guide: How to Reset Your Service Brake System Light
Let’s dive into the nitty-gritty of resetting your Service Brake System light. We’ve broken it down into easy-to-follow steps so you can breeze through the process:
Step 1: Park Safely
Ensure your vehicle is parked safely, the engine is turned off, and the parking brake is engaged.
Step 2: Locate the OBD-II Port
Find your vehicle’s On-Board Diagnostics (OBD-II) port, typically located beneath the dashboard near the driver’s seat.
Step 3: Connect the OBD-II Scanner
Plug your OBD-II scanner into the port, ensuring a secure connection.
Step 4: Power On the Scanner
Turn on the scanner and follow the manufacturer’s instructions to access the reset option for the Service Brake System light.
Step 5: Reset the Light
Execute the reset procedure, and in most cases, the light should disappear from your dashboard.
Step 6: Confirm the Reset
Turn off the scanner, disconnect it from the OBD-II port, and start your vehicle. Verify that the Service Brake System light is no longer illuminated.
How to Reset Service Brake System Light 2004 Silverado
Resetting the “Service Brake System” light on a 2004 Chevrolet Silverado typically involves addressing the issue that triggered the warning in the first place, such as low brake fluid or a brake system malfunction.
Here are the general steps to reset the light:
- Check Brake Fluid Level: First, check the brake fluid level in the brake fluid reservoir. If it’s low, you may need to add brake fluid to the recommended level. Use the type of brake fluid specified in your owner’s manual.
- Inspect Brake System: Inspect your brake system for any visible issues, such as damaged brake lines, worn brake pads, or leaking brake fluid. Address any problems you find.
- Repair or Replace Components: If you discover any damaged or worn-out brake components, replace or repair them as needed. This could include brake pads, brake rotors, brake lines, or brake calipers.
- Disconnect the Battery: To reset the warning light, you may need to disconnect the vehicle’s battery for a few minutes. This will clear the error codes stored in the vehicle’s computer. Make sure you have any necessary radio codes or presets, as disconnecting the battery will also reset these.
- Reconnect the Battery: After a few minutes, reconnect the battery. Tighten the terminals securely.
- Start the Engine: Start the engine and check if the “Service Brake System” light is still illuminated. If the issue has been resolved and there are no other brake system problems, the light should no longer be illuminated.
If the light remains on after performing these steps, there may be a more significant issue with the brake system that requires professional diagnosis and repair. In such cases, it’s advisable to have the vehicle inspected by a qualified mechanic or take it to a Chevrolet dealership for further diagnosis and repair.
How to Reset Service Brake System Light Silverado 2003
Resetting the “Service Brake System” light on a 2003 Chevrolet Silverado may require addressing the underlying issue with the brake system that triggered the warning light. Here are the steps you can follow to reset the light:
- Check the Brake System: Before attempting to reset the light, it’s crucial to ensure that your brake system is in proper working condition. Inspect the brake fluid level, brake pads, and brake lines for any signs of damage or wear. If you find any issues, address them before proceeding.
- Fix the Underlying Issue: If you discover a problem with the brake system (e.g., low brake fluid, worn brake pads, brake fluid leak), resolve it. In some cases, simply fixing the issue may cause the “Service Brake System” light to turn off on its own after a few drive cycles. However, in other cases, you may need to follow the reset procedure below.
- Disconnect the Negative Battery Terminal: To reset the warning light, you can try disconnecting the negative battery terminal. This will reset the vehicle’s computer systems, including the one responsible for monitoring the brake system. Use a wrench or pliers to loosen the nut on the negative terminal, then carefully remove the terminal from the battery post.
- Wait for a Few Minutes: Leave the negative terminal disconnected for about 15-30 minutes. This will allow any residual power in the vehicle’s electrical system to dissipate.
- Reconnect the Battery Terminal: After waiting, reconnect the negative battery terminal and tighten the nut securely.
- Turn the Ignition Key: Insert the ignition key into the ignition switch and turn it to the “ON” position without starting the engine. Do not start the engine during this step.
- Press the Brake Pedal: While the key is in the “ON” position, press and release the brake pedal slowly three times.
- Start the Engine: Start the engine and check if the “Service Brake System” light has turned off. If it remains on, there may still be an underlying issue with the brake system that needs attention, and you should have the vehicle inspected by a qualified mechanic.
Please note that disconnecting the battery may also reset other settings in your vehicle, such as radio presets and clock settings, so be prepared to reconfigure these settings as needed.
How to Reset Service Brake System Light on a 2006 Silverado
Is that pesky service brake system light illuminating your 2006 Silverado’s dashboard? Before you rush to the mechanic, here’s a quick guide on how to reset it yourself:
- Turn Off Your Vehicle: Start by turning off the ignition and ensuring the vehicle is in a stationary position.
- Open the Hood: Pop the hood to access the engine compartment.
- Locate the Brake Fluid Reservoir: Look for the brake fluid reservoir. It’s usually located on the driver’s side, near the back of the engine compartment. The cap may even say “Brake Fluid.”
- Check Brake Fluid Level: Ensure the brake fluid is at the recommended level. If it’s low, top it up with the appropriate brake fluid for your Silverado.
- Disconnect the Negative Battery Cable: Using a wrench or pliers, disconnect the negative cable from the battery. This will reset the vehicle’s computer.
- Wait for a Few Minutes: Leave the battery cable disconnected for about 10-15 minutes. This time allows the vehicle’s computer to reset and clear any fault codes.
- Reconnect the Battery Cable: Reattach the negative battery cable securely.
- Turn On the Ignition: Turn the ignition to the “On” position without starting the engine. This will power up the vehicle’s systems.
- Pump the Brake Pedal: Gently pump the brake pedal a few times.
- Check the Dashboard: Look at the dashboard to see if the service brake system light has turned off. If it has, you’ve successfully reset it!
- Take a Test Drive: Before hitting the road, take a short test drive to make sure the light doesn’t come back on. If it stays off, you’re good to go.
Remember that while this method can clear some common issues that trigger the service brake system light, it won’t fix underlying brake problems. If the light comes back on or if you suspect any brake issues, it’s best to have a professional mechanic inspect your Silverado’s braking system to ensure safety on the road.
What Does Service Brake Booster Mean
The term “service brake booster” refers to a component in a vehicle’s braking system that assists the driver in applying the brakes with less physical effort. The brake booster, also known as a vacuum booster, is typically located between the brake pedal and the master cylinder in a car’s engine compartment.
Here’s how it works:
- Brake Pedal: When you press the brake pedal, it creates hydraulic pressure in the braking system. This pressure is what ultimately allows the vehicle to slow down or come to a stop.
- Brake Booster: The brake booster is connected to the brake pedal. It uses vacuum pressure from the engine to amplify the force you apply to the brake pedal. This means that when you press the pedal, the brake booster makes it easier to generate the necessary hydraulic pressure, requiring less physical effort from the driver.
The term “what does it mean when it says service brake booster” typically appears in the context of vehicle maintenance and repair. If you see a warning light on your dashboard or experience a decrease in braking performance, it could be related to an issue with the brake booster. When you encounter the phrase “service brake booster,” it usually means that the brake booster needs attention, inspection, or repair to ensure that your vehicle’s braking system functions properly and safely.
How to Reset Service Brake Booster Light
The “Service Brake Booster” light is a warning indicator that appears on some vehicles when there is an issue with the brake booster system. It’s important to note that this light should not be reset without first diagnosing and addressing the underlying problem, as it could compromise your vehicle’s safety. The brake booster is a critical component of the braking system, and any issues with it should be addressed by a qualified mechanic.
Here are the general steps to address the “Service Brake Booster” light:
- Check Your Owner’s Manual: Start by consulting your vehicle’s owner’s manual. It may contain specific information about what the light means and how to address it.
- Inspect for Immediate Issues: Look for any visible issues with the brake booster system, such as disconnected hoses, damaged vacuum lines, or loose connections. If you find any obvious problems, address them if you have the necessary skills and tools, or take your vehicle to a professional mechanic.
- Check Brake Fluid Level: Ensure that your brake fluid level is within the recommended range. Low brake fluid can cause issues with the brake booster. If the fluid is low, top it up with the appropriate brake fluid for your vehicle.
- Inspect Brake Pedal and Linkages: Check for any abnormalities with the brake pedal or its linkages. Sometimes, a malfunction in the pedal assembly can trigger the “Service Brake Booster” warning light.
- Use a Code Scanner: Many modern vehicles are equipped with onboard diagnostic systems that can store fault codes related to the “Service Brake Booster” light. You can use an OBD-II scanner to retrieve these codes, which can provide more specific information about the issue. Write down or note the codes before clearing them.
- Clearing the Light: Once you have addressed any immediate issues and recorded any fault codes, you can attempt to clear the warning light using the OBD-II scanner. However, keep in mind that clearing the light without fixing the underlying problem will likely result in the light coming back on. It’s essential to resolve the issue first.
- Professional Inspection: If you’re unable to identify or address the problem yourself, or if the light continues to come on after clearing it, it’s crucial to take your vehicle to a qualified mechanic or a dealership for a thorough inspection and repair. They have the expertise and tools to diagnose and fix brake booster issues correctly.
Remember that the “Service Brake Booster” light is a safety warning, and driving with a malfunctioning brake booster can be dangerous. Always prioritize safety and have brake issues inspected and repaired by professionals.
Credit: www.tahoeyukonforum.com
What Causes Service Brake Light to Come On?
When you press the brake pedal in your car, a switch is activated that turns on the brake light. The purpose of this light is to warn other drivers that you are slowing down or stopping.
There are a few reasons why the brake light might come on, even when you’re not pressing the pedal.
One possibility is that there is a problem with the switch itself.
Another possibility is that there is a leak in the hydraulic system that activates the brakes. If this is the case, it’s important to get it fixed as soon as possible because it could lead to your brakes failing entirely.
If your brake light comes on and you’re not sure why, it’s always best to have it checked out by a professional mechanic. They’ll be able to diagnose the problem and let you know if it’s something serious or not.
Conclusion
If your service brake system light is on in your 2004 Chevy Silverado, it’s likely because there’s an issue with the system. To reset the light, you’ll need to find and fix the problem. You can check the brakes by doing a visual inspection, listening for any unusual noises, and feeling for any vibration when you press the brake pedal.
If you can’t find anything wrong with the brakes themselves, then it’s likely that there’s an issue with one of the sensors in the system. Once you’ve found and fixed the problem, you can reset the service brake system light by disconnecting and reconnecting the battery.