A supercharger is a device that compresses air and increases its density before supplying it to the engine, resulting in improved performance. Installing a supercharger can significantly increase the horsepower of your car. However, improper installation can lead to serious damage to the engine or even become a safety hazard.
In this guide, we will provide an overview of how to install a supercharger and the various factors to consider before buying one.
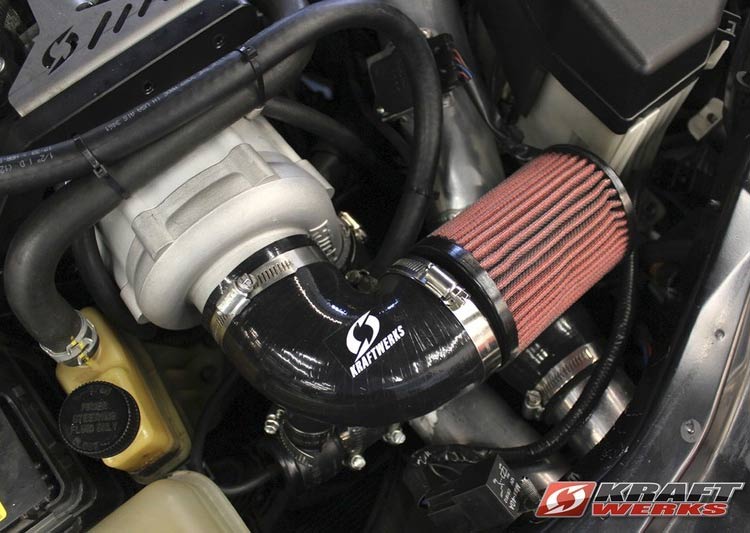
Credit: www.drifted.com
Preparing For Installation
Preparing for installation of supercharger requires gathering of required tools and materials as well as proper engine preparation. Necessary tools include sockets, ratchet, torque wrench, pliers, screwdrivers, and safety glasses, among others. The materials needed include a supercharger kit, gasket maker, engine oil, and a new air filter.
Prior to installation, ensure the engine is clean, and there are no loose wires or connections around the engine bay. Remove the alternator, belt, and coolant reservoir to expose the front of the engine. The next step is to mount the supercharger kit onto the engine using the provided brackets.
Lastly, reinstall the belt, alternator, and coolant reservoir.
How To Install A Supercharger-The Installation Process
Installing a supercharger is a complex and technical process that requires a good understanding of automotive mechanics and engine systems. If you’re not experienced with this kind of work, it’s recommended to consult with professionals or experienced enthusiasts who can assist you.
However, I can provide a general overview of the steps involved in installing a supercharger:
1. Gather Information: Before you begin, research the specific supercharger kit you’re planning to install. Understand its compatibility with your vehicle’s engine, required modifications, and any additional components you might need.
2. Prepare the Workspace: You’ll need a well-equipped and properly ventilated workspace with adequate lighting. Make sure you have all the necessary tools and safety equipment.
3. Disconnect Battery: For safety reasons, disconnect the vehicle’s battery before starting any work on the engine.
4. Gather Tools and Parts: Make sure you have all the tools and parts required for the installation, including wrenches, sockets, pliers, torque wrenches, gaskets, brackets, belts, and other components provided in the supercharger kit.
5. Remove Necessary Components: You’ll likely need to remove various components to gain access to the engine. This might include the air intake system, throttle body, intercooler (if applicable), and possibly even the front bumper or grille.
6. Install Supercharger Bracket and Mounting: Follow the instructions provided with the supercharger kit to install the bracket and mounting components. This step may require drilling, tapping, or modifying existing components.
7. Install Supercharger Unit: Carefully install the supercharger onto the mounting bracket. Ensure that all connections, bolts, and fasteners are tightened according to the manufacturer’s specifications.
8. Modify Engine Components: Depending on the specific supercharger kit and your vehicle, you might need to modify various engine components, such as the intake manifold, fuel system, and exhaust system. Follow the provided instructions closely to ensure proper installation.
9. Install Intercooler (If Applicable): If your supercharger kit includes an intercooler, install it according to the instructions. Intercoolers help cool the compressed air before it enters the engine, increasing efficiency and power.
10. Reassemble Components: Reinstall any components you removed earlier, such as the air intake, throttle body, and any other parts. Make sure everything is properly secured and connected.
11. Belt Installation: Install the supercharger drive belt according to the provided instructions. Proper tension is crucial, so use a belt tensioning tool or method recommended by the manufacturer.
12. Check for Clearance and Adjustments: Ensure that all components have proper clearance and that there are no interference issues when the engine operates.
13. Double-Check Everything: Before starting the engine, double-check all connections, bolts, and components to ensure they are properly installed and tightened.
14. Test and Tune: After installation, the vehicle will likely require tuning to optimize performance. This involves adjusting parameters in the engine control unit (ECU) to accommodate the increased airflow and boost from the supercharger.
15. Professional Inspection: It’s highly recommended to have your vehicle inspected by a professional mechanic who is experienced with supercharger installations. They can check for any potential issues, verify the installation, and make necessary adjustments.
Remember, every vehicle and supercharger kit is unique, so it’s crucial to follow the specific instructions provided by the manufacturer. If you’re not confident in your abilities, seeking help from experienced professionals is the best way to ensure a successful and safe installation.
Can You Install A Supercharger In Your Home Garage?
Troubleshooting And Maintenance
Installing a supercharger can be a great performance upgrade for your vehicle, but proper maintenance is crucial for optimal performance. To troubleshoot any issues, start with a thorough system check and understand the different components of your supercharger. Be sure to monitor boost levels, check for leaks, and clean the air filter regularly.
It’s also important to use high quality oil and keep an eye on belt tension and wear. Additionally, avoid overuse and carefully follow installation instructions to prevent unnecessary damage or wear. By staying on top of maintenance, you can enjoy the full benefits of your supercharger for years to come.
Conclusion
After following these simple steps, you can successfully install a supercharger in your vehicle. A supercharger addition will bring an impressive boost to your engine’s performance, making it an exciting and worthwhile endeavor. However, remember to take the necessary safety measures and not to rush the installation process.
It is always crucial to double-check your work and ensure that all parts are properly installed and secured. Additionally, don’t forget to break in the new supercharger correctly and follow the recommended maintenance schedule accurately. Regular maintenance and tune-ups will help maximize your supercharger’s lifespan and ensure optimal performance.
With proper installation and maintenance, your supercharged ride will be sure to turn heads and provide an exhilarating driving experience for years to come.