The crankshaft position sensor is an essential component in the engine management system that helps regulate the ignition timing and fuel injection cycle. However, over time, it is susceptible to dirt, debris, and oil buildup that can impair its performance. If left uncleaned, it can severely affect the engine’s operation, leading to problems such as misfires, stalling, and decreased power.
Therefore, it is important to maintain the crankshaft position sensor regularly. In this blog, we will guide you on how to clean the crankshaft position sensor properly, ensuring it works optimally and keeps your vehicle running smoothly.
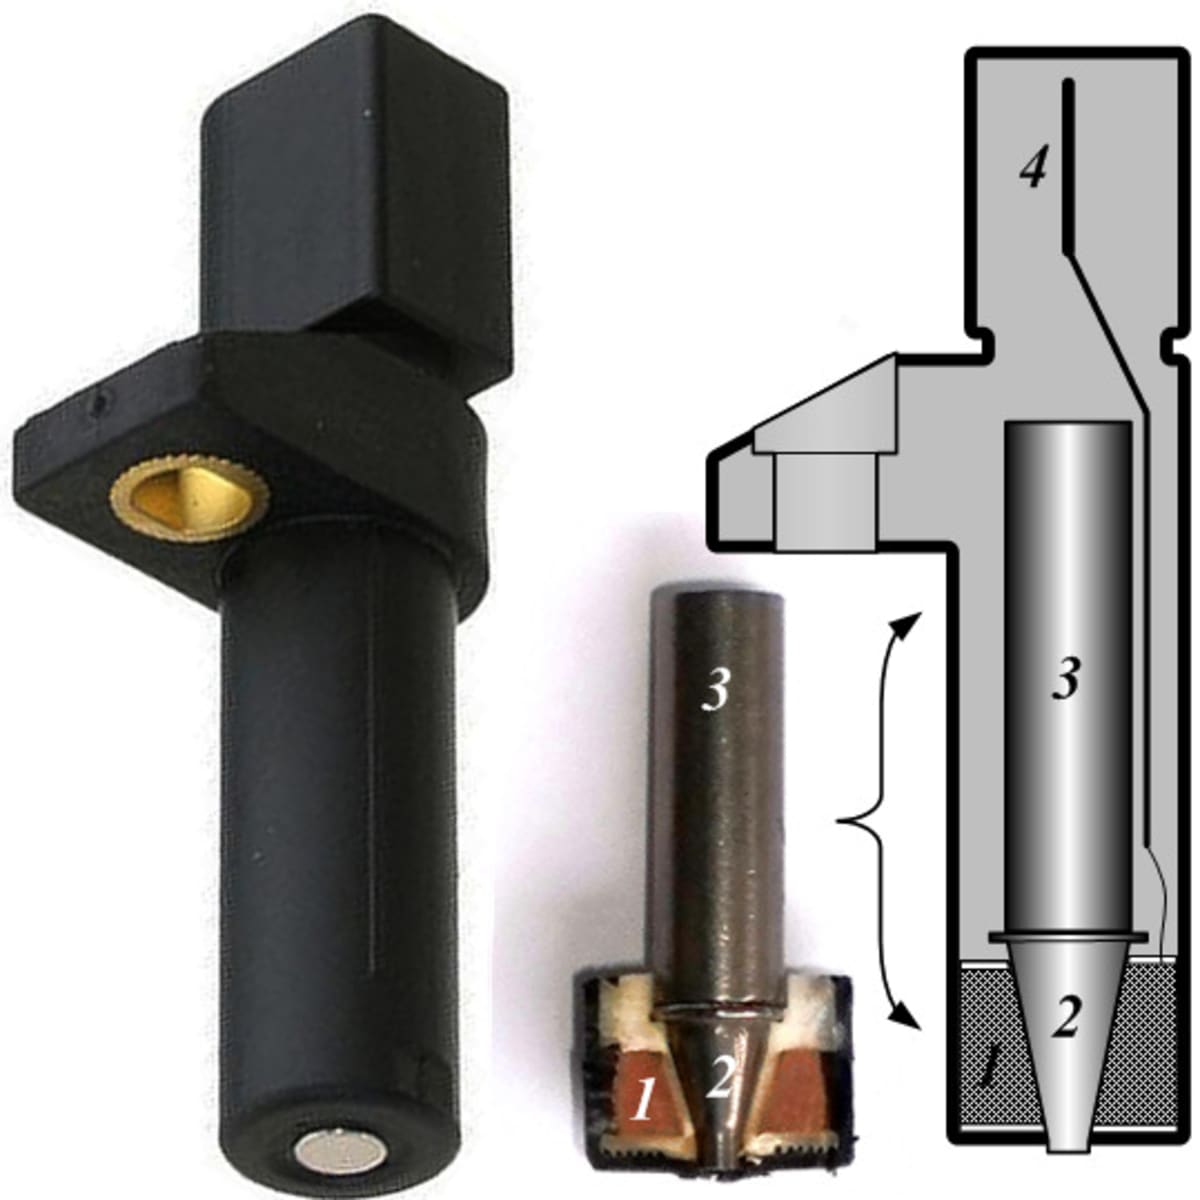
Credit: axleaddict.com
Symptoms Of A Dirty Crankshaft Position Sensor
If you are experiencing issues while shifting gears, an uneven engine, or a random power loss, it might be due to a dirty crankshaft position sensor. This vital component in your vehicle’s engine is responsible for monitoring the engine’s rotational speed and positioning.
It is therefore crucial to keep it clean and free from any contaminants. Here, we will discuss the symptoms of a dirty crankshaft position sensor and how it affects your vehicle’s performance.
Detailed Description Of Each Symptom
- Rough or irregular idling: when the crankshaft position sensor sends incorrect signals to the engine control module, it may cause the engine to idle erratically or stall. This is because critical components such as the fuel injection system, ignition timing, and spark plugs rely on accurate readings from the sensor to function correctly.
- Slow acceleration of the engine: if the crankshaft position sensor is dirty, it may not detect the positioning of the engine’s gears correctly. This can cause a delay in the engine’s response when you step on the gas pedal.
- Stalling or shutting down of the engine: a faulty crankshaft position sensor may result in repeated stalling or shutting down of the engine while driving. Not only is this frustrating, but also, it can be very dangerous.
- Difficulty starting the engine: if the sensor is unable to communicate accurately, the engine may not start at all. Even if it starts, it may take multiple turns of the key in the ignition before it starts.
- Reduced fuel efficiency: a dirty crankshaft position sensor can cause the engine to receive the incorrect information, leading to the overconsumption of fuel.
- Illumination of check engine light: if the sensor is not functioning correctly, it may trigger the check engine light on the dashboard.
Examples Of How Each Symptom May Affect The Performance Of A Vehicle
The symptoms of a dirty crankshaft position sensor can negatively affect your vehicle’s overall performance.
- Irregular idling can cause an uncomfortable vibration in the vehicle, especially in stationary traffic conditions.
- Slow acceleration can lead to a slow start, making it difficult if you need to quickly move from a stationary position.
- Frequent engine stalling or shutting down can be dangerous if it occurs in the middle of a highway or freeway. It can also damage expensive transmission components.
- Difficulty in starting the engine can cause frustrating delays, leading to unusually late arrivals.
- Reduced fuel efficiency may drain your wallet faster than usual and cause more frequent trips to the gas station.
- An illuminated check engine light can be a source of anxiety, fearing an expensive car repair.
Monitoring the symptoms of a dirty crankshaft position sensor is essential to keep your vehicle running smoothly. By being aware of the issues that can arise from a dirty crankshaft position sensor, you can make the necessary maintenance to your vehicle to ensure that all the systems function optimally.
Preparations For Cleaning The Crankshaft Position Sensor
If you’re experiencing engine problems or sudden stalling of your vehicle, it may be due to a faulty crankshaft position sensor. In this blog post, we’ll explore how to clean the crankshaft position sensor, a simple and effective maintenance process to improve your vehicle’s performance.
Tools Needed For The Cleaning Process
To properly clean the crankshaft position sensor, you’ll need the following tools:
- Basic mechanic’s toolset (wrenches, pliers, etc.
- Crc electronic cleaner spray
- A clean rag or paper towel
- Safety goggles
- Latex gloves
Steps To Clean A Crankshaft Position Sensor
If you’re experiencing engine trouble in your vehicle, a dirty crankshaft position sensor could be the culprit. This sensor monitors the speed and position of your crankshaft, which tells the engine when to fire the spark plugs. If the sensor is dirty, it could misread the information and cause your engine to misfire or not start at all.
Step By Step Guide On How To Clean The Sensor
Once you’ve located the crankshaft position sensor, it’s time to clean it.
- Disconnect the electrical connector from the sensor by pressing down on the tab or prying it off gently with a screwdriver.
- Use electrical contact cleaner and a small, soft-bristled brush to clean the sensor’s tip. If there is evidence of damage, replace it as continuing to clean might cause further damage.
- Spray the sensor tip with compressed air to remove any remaining dirt or debris.
- Reconnect the electrical connector to the sensor.
- Reinstall any components that were removed to access the sensor.
Important Tips To Keep In Mind While Cleaning
When cleaning your crankshaft position sensor, it’s important to keep a few things in mind to avoid further damage or engine malfunctions.
- Always use electrical contact cleaner specifically designed for cleaning electrical components. Do not use general purpose cleaners or solvents like acetone.
- Be gentle when cleaning the sensor. Coarse or hard-bristled brushes can damage the sensor’s tip.
- Avoid touching the sensor’s tip with your hands or dirty clothes. Skin oils and other debris can interfere with the sensor’s readings.
- Double-check your work by starting your engine and ensuring it runs smoothly.
By following these steps and tips, you can successfully clean your crankshaft position sensor and avoid costly repairs and engine malfunctions.
Testing The Crankshaft Position Sensor After Cleaning
Crankshaft position sensor is a crucial part of an engine’s performance. It measures the position and rotational speed of the engine crankshaft. If you sense that your vehicle is experiencing engine misfires, stalling, or starting problems, it may be time to clean the crankshaft position sensor.
However, after cleaning the sensor, it’s important to test it to ensure that it’s working correctly. In this blog post, we will explain the importance of testing the sensor after cleaning, provide you with a step-by-step guide on how to test the sensor, and highlight what to look out for while carrying out the test.
What to Do After Replacing Crank or Camshaft Sensor and Now Engine Won’t Start or Runs Rough
Explanation Of The Importance Of Testing The Sensor After Cleaning
Cleaning the crankshaft position sensor is only one part of the process. After cleaning, it’s essential to test the sensor to ensure that it’s working correctly. The importance of testing the sensor after cleaning cannot be overstated. Testing the sensor enables you to detect if there are any underlying issues that may cause problems with your engine’s performance.
- It helps prevent costly repairs in the future
- It detects sensor failure or malfunction
- It ensures that the sensor is working correctly and accurately measuring the crankshaft’s position and speed
Step By Step Guide On How To Test The Sensor
Testing the sensor after cleaning is a relatively straightforward process that requires some tools.
- Turn off the engine and remove the key from the ignition.
- Locate the crankshaft position sensor usually located near the engine’s crankshaft on the backside of the engine block.
- Disconnect the sensor’s electrical connector.
- Use a multimeter on the ohm setting to test the resistance of the sensor.
- Insert one meter lead into one of the sensor’s electrical terminals and the other into the other electrical terminal.
- Read and note the multimeter’s readings.
- Replace the sensor if the reading is out of the specified range or if it reads an infinite number.
What To Look Out For While Carrying Out The Test
When testing the crankshaft position sensor after cleaning, it’s essential to look out for some things.
- Ensure that the sensor is the right fit for your car model.
- Use the right tools when testing the sensor.
- Check the sensor’s connector for any signs of corrosion or damage.
- Remember to check the power supply and ground connection to the sensor.
- Confirm that the sensor readings are within the specified range.
Testing your crankshaft position sensor after cleaning is essential for maintaining your engine’s performance and detecting any underlying issues. Use this guide to test your sensor correctly and ensure that your engine runs smoothly.
Conclusion
Having a faulty crankshaft position sensor can cause major engine problems, so keeping it clean and maintained is crucial for your vehicle’s performance. Whether you’re an experienced mechanic or a beginner, the step-by-step guide we’ve provided in this post can help you clean and revive your sensor without damaging it.
By following these simple steps, you can ensure that your vehicle is running efficiently and that potential issues are prevented. Don’t forget to disconnect the battery beforehand, before commencing work, and only use the recommended substances and tools. As a responsible car owner, it’s your duty to keep your car well-maintained, and taking care of your crankshaft position sensor is one of the things you can do.
We hope that this guide will help you in cleaning your crankshaft position sensor and save you both time and money in the long run.